Associate Teaching Professor of Linguistics at UC San Diego
Director of UCSD's Computational Social Science Program
How to make a spectrogram into a 3D Printed Physical Object
July 9th, 2023
As anybody working with fourier transforms and spectrograms understands, it’s tricky to get students to understand higher dimensional representations of data, and to truly see the relationship between a power spectrum (or more aptly, a series of power spectra) and a two-dimensional spectrogram.
One of the ways I’ve found some success doing this is by re-adding the missing ‘third dimension’, and showing them that a spectrogram is a bunch of spectral slices stood up and lined up over time. You can do this using software like sndpeek, which re-adds the dimension digitally, or you can make it more tactile, by creating a spectrogram physically. This is also a wonderful technique for teaching students who are blind.
Today, I’ll show you how to do that, using only free and open-source software, on a Linux or MacOS computer (and perhaps Windows too, not sure what of this runs over there).
Step 1: Sound to Image
First, you’ll want to take your sound file and create a spectrogram image, using whatever software you prefer.
You’ll want your spectrogram to be:
- Grayscale, where black represents highest power
- Devoid of axis labels or marked axes
- Tightly cropped (e.g. the edges of the spectrogram are the edges of the file)
- Saved as .png, which turns out to be important here for using OpenSCAD
- Saved as a relatively small file (<1000pixels on the widest
dimension)
- Your 3D printer likely doesn’t have the ability to render detail finer than this, and large files eat memory.
For linguists, Praat is usually the choice. To do this, I’ll send you to Using Praat for Linguistic Research, where in the below numbered sections, you can learn to:
- Open (6.1) or Record (5) a sound file
- Crop the section you care about (7.1.1)
- Create a spectrogram with settings to your taste (7.2)
- Save it as a nice-quality image (9)
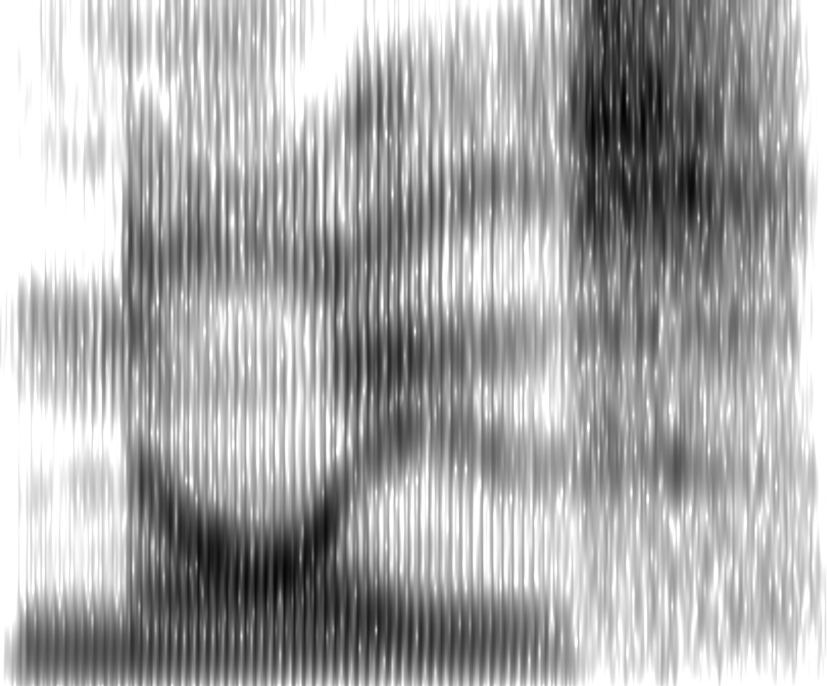
At the end of this process, you should have an image something like this, which is the word ‘noise’, which I find to be the most beautiful English word on a spectrogram:
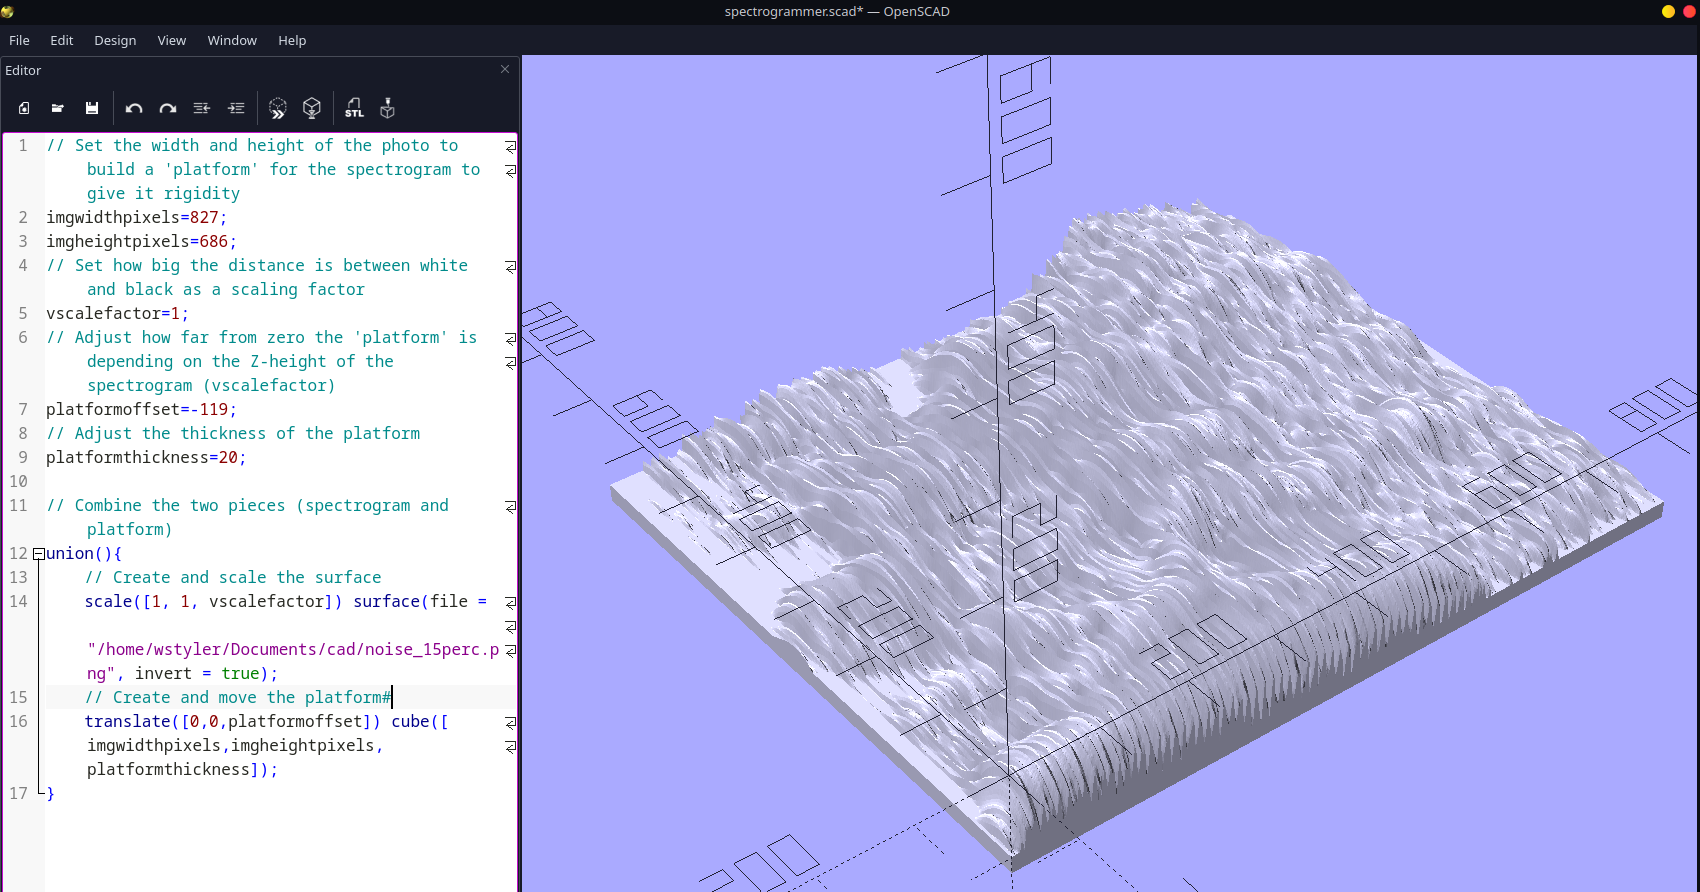
Step 2: Image to STL file
Next, you’ll want to download OpenSCAD, which is a very nerdy and, being real, rather unintuitive program for modeling 3D objects using code.
Our core tool here is surface(), which exists to
transform matrices of numbers (which is what a black and white image is)
into 3D surfaces. It’ll read in the image file and make the blackest
parts high, and the whitest parts low. So, we just need to make the
output properly scaled and rigid (because by default, it just prints the
‘fins’ of the spectrogram on a zero-thickness layer).
To do this, you can use this SCAD file.
We’re going to tell OpenSCAD:
- Where the image is (by modifying the path to the image)
- How large the image is
- The vertical range (e.g. distance from lowest to highest point)
- How thick you want the ‘platform’
Then you’ll adjust the offset of the platform so that it forms one solid piece with the spectrogram.
Once you’ve plugged that information in, first, in the ‘Design’ menu, “Preview” and then “Render”, then under file, ‘Export as STL’, saving the file as you’d like.
A few provisos:
- This process is computationally difficult, and the
difficulty scales with the size of the image.
- You should expect the “Render” step to take minutes, not seconds
- If it’s taking too long or failing, shrink the input image’s pixel dimensions
- This requires a good bit of RAM
- The 827x686 image above, once rendered, requires around 20GB of RAM to properly render on my (Fedora Linux) desktop
Once this has finished, you’ve got a (very complicated) STL file, looking something like the below:
This is a thing that you can print yourself, send to a
nerd friend with a 3D printer, give to a campus makerspace,
or even send to one of the companies online that prints stl files as a
service. If you’re a linguist, email me, and I’m happy to print for the
cost of shipping and materials.
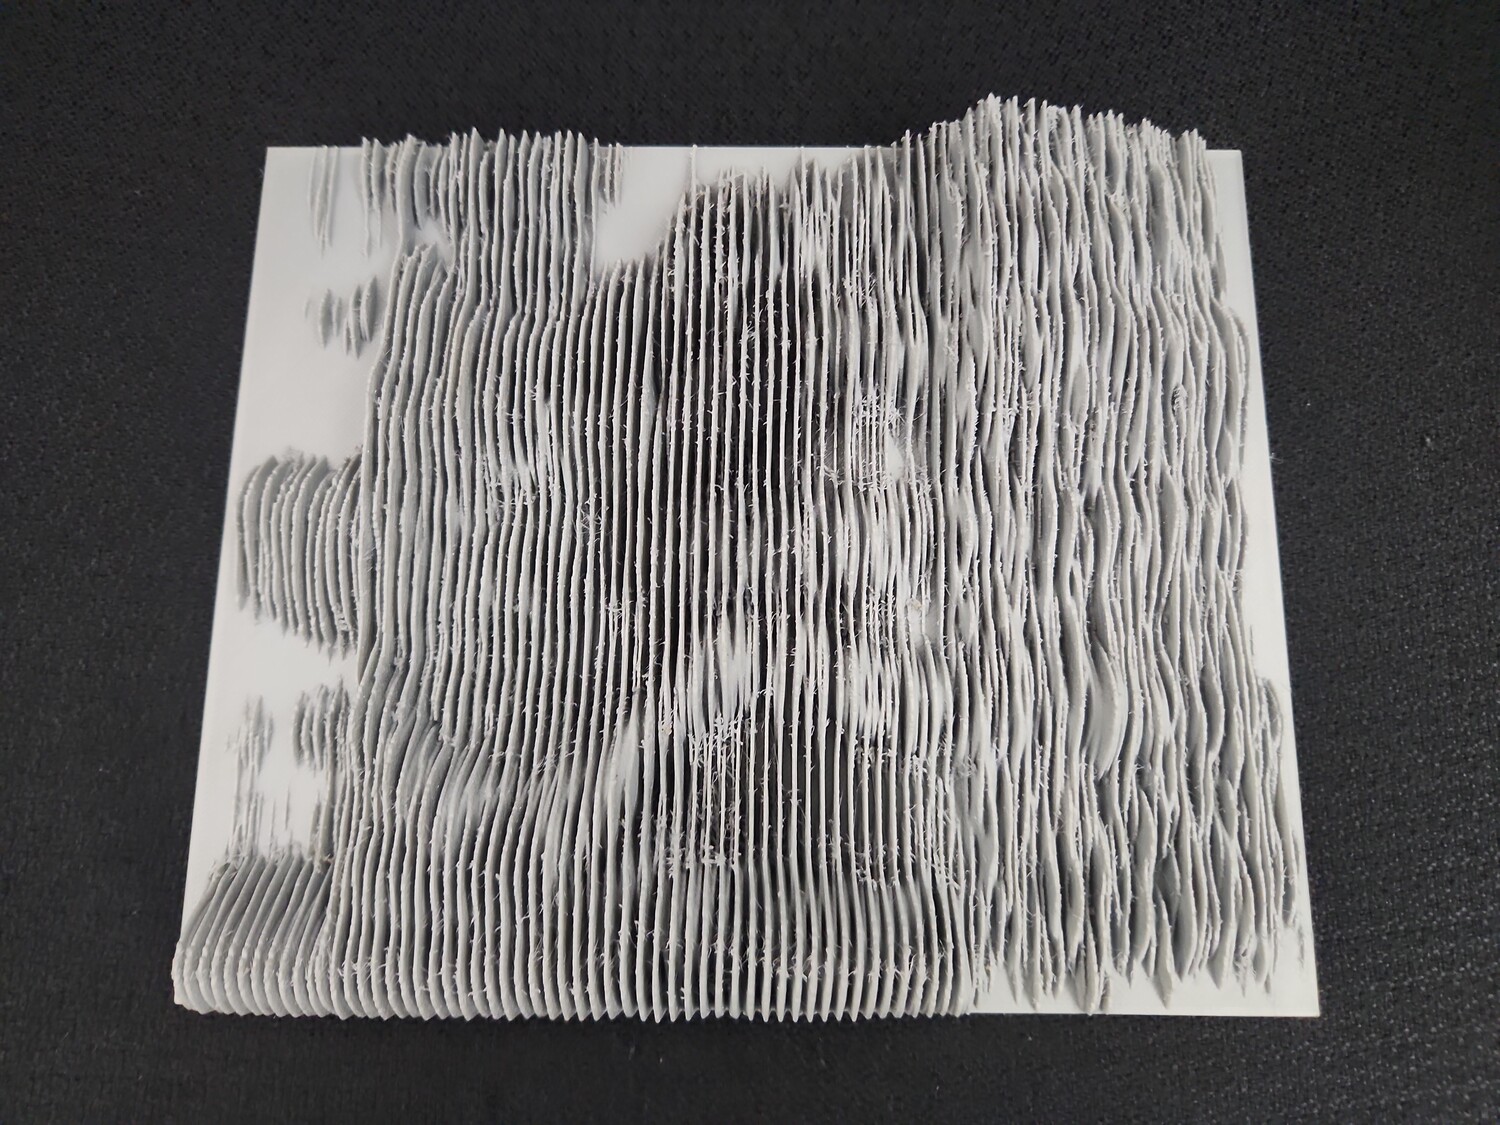
Step 3: STL file to physical object
This final step will depend very much on your 3D printing setup. I’m using a filament-extrusion Prusa i3 MK3S+ printer, because I appreciate their take on open source, open hardware, and right to repair, but you may have a different printer using a different slicer, so your software may look different.
For me, I open up Prusa Slicer and import the STL. Then, I scale it to the physical size I want (e.g. to fit my print bed, I scale the OpenSCAD output to around 23%). I also generally add a brim to the outside, to help with bed adhesion, and make other adjustments to print speed, etc.
Then, I ‘slice’ the file, which generates the machine code which the printer ‘runs’ to create the object. This is also computationally difficult, and I’d recommend giving your computer a few minutes and some fresh air. To give you a sense, the sample png above requires 1.8 million facets to model.
Then, I put the file in the printer, and, 49 hours later, I have a physical manifestation of sound. Neat!